The Idea is to create a controlled living room/entertainment station using the raspberry Pi as a media center, torrent down-loader,file storage and to operate electrical switches.
Please use caution and diligence as components use live AC and hence is dangerous.
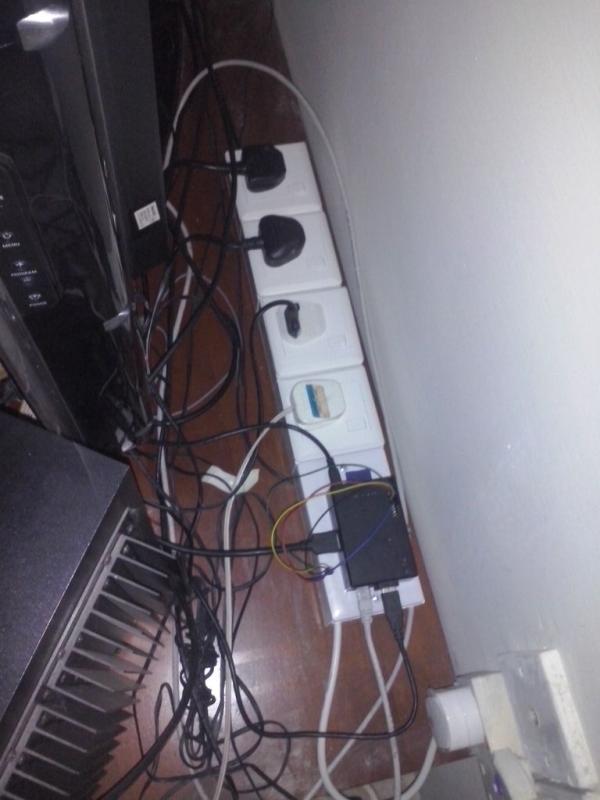
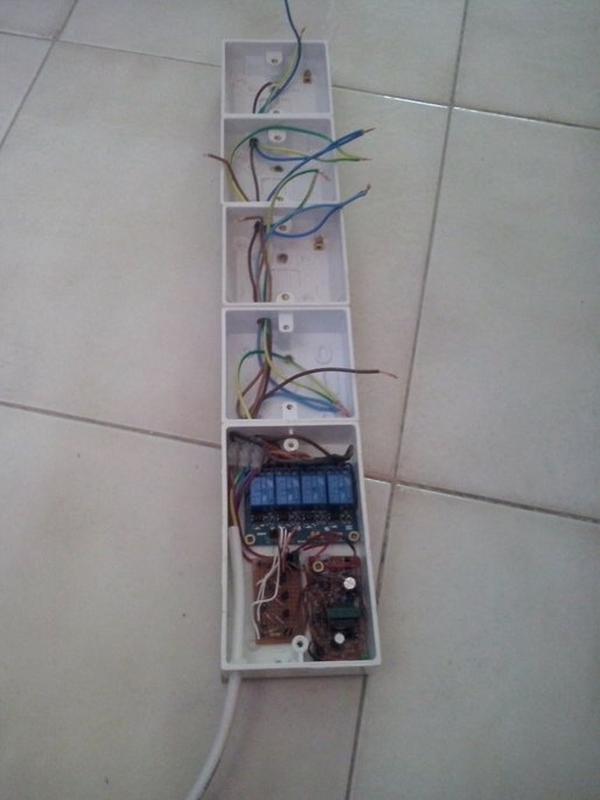
The Finished product is what it looks like Above:
Step 1: Items You Will Need
What you will need are the following:
- A raspberry pi (pref Model B)
- An SD Card for the pi
- A relay board
- An Ac to dc power supply
- 3 core wire 1mm dia (around 3m)
- A plug
- 4 x wall plug female sockets and their boxes
- 1 x 2 socket plug box and its cover
- Piece of wood (chipboard will do) to use as backing
- Self taping screws 1/4 inch
Electronic components:
- 4 x Transistors 2N2222
- 4 x Resistors 2.2K Ohm
- 4 x Resistors 10K Ohm
- 1 x LM7805 Voltage regulator
- 1 x 0.33 Microfarad capacitor
- 1 x 0.1 Microfarad capacitor
- Some vero board
- Some wire
Step 2: Building the Plug Units
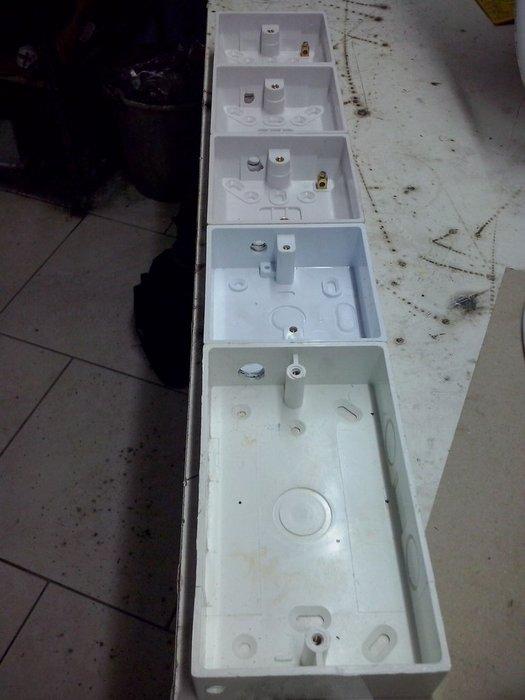
Line the boxes up together and mark them so that you can drill holes as the picture below. The idea is to be able to pass the wires through them.
Step 3: Adding the Backing
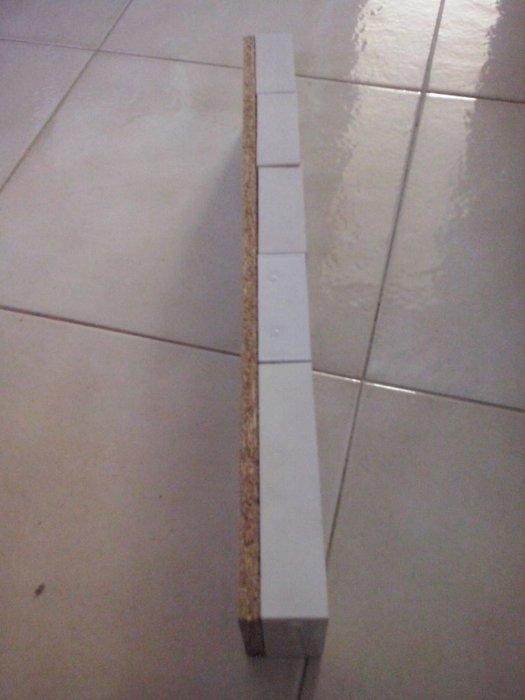
Use the wood to create the back underlying the boxes and use the self tapping screws to secure the boxes to the wood.
Step 4: The Electronic Bits
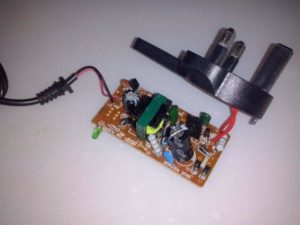

You will need to hack the power supply. I used an AC to DC (9 Volts). Any power supply will do, however keeping it between 7V and 12V is recommended.
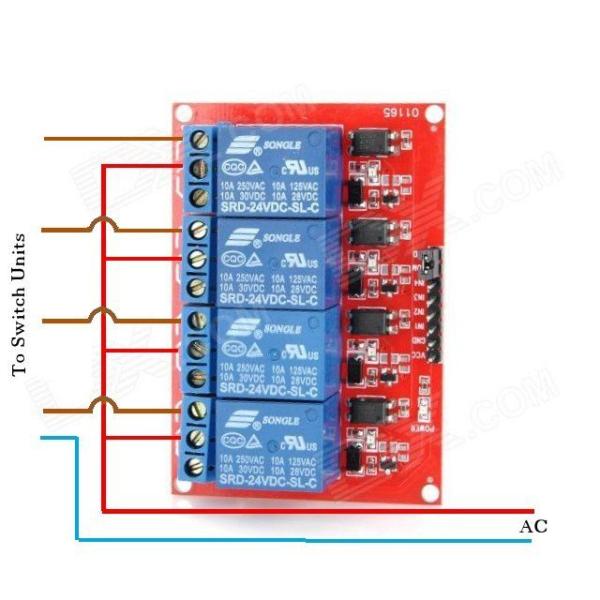
Place the relay board and the power supply as per the photo. Mark where the holes are and use the self tapping screws to keep them in place.
Next will be needing to build an electronic circuit for the transistors.
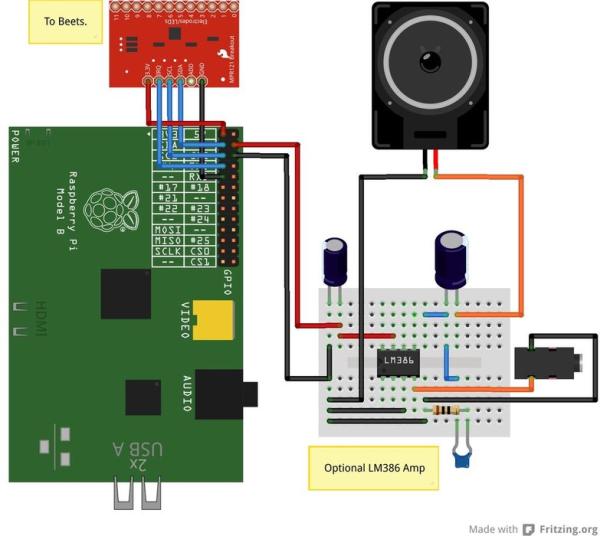
Step 5: The Electronic Circuit.
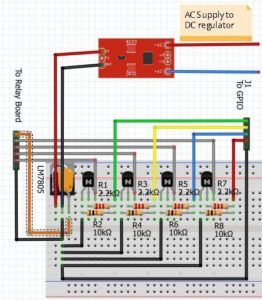
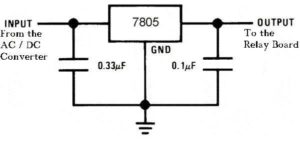
This is where the transistors,resistors,capacitors and LM7805 come in. I built this on a piece of vero board and secured it in place with the other electronic components.
Once built this takes the DC power from the AC to DC converter and regulates it to 5V for the relay board via the LM7805.
The Raspberry Pi controls the transistors which in turn control the relays.
Step 6: Wiring the AC
This is the dangerous part, please make sure you know a thing or two about AC before you do this. Always use proper insulation. How you do this I will leave up to you however I will post pictures with the way I wired mine.
The AC needs to feed the AC / DC voltage converter, the LIVE feed needs to goto each relay which acts as the switch for the sockets and the NEUTRAL and EARTH is daisy chained into each socket.
Before you close up make sure that the components are secure and cannot move around.
Step 7: The Raspberry Pi Part

From the Electronic circuit previously made connect the transistors to the raspberry Pi GPIO ports as shown in the PIC above. Ground goes to ground and the other 4 GPIO pins are connected to the transistors.
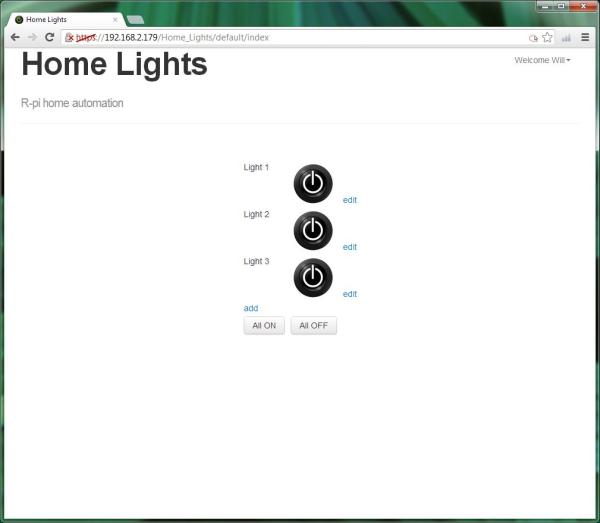
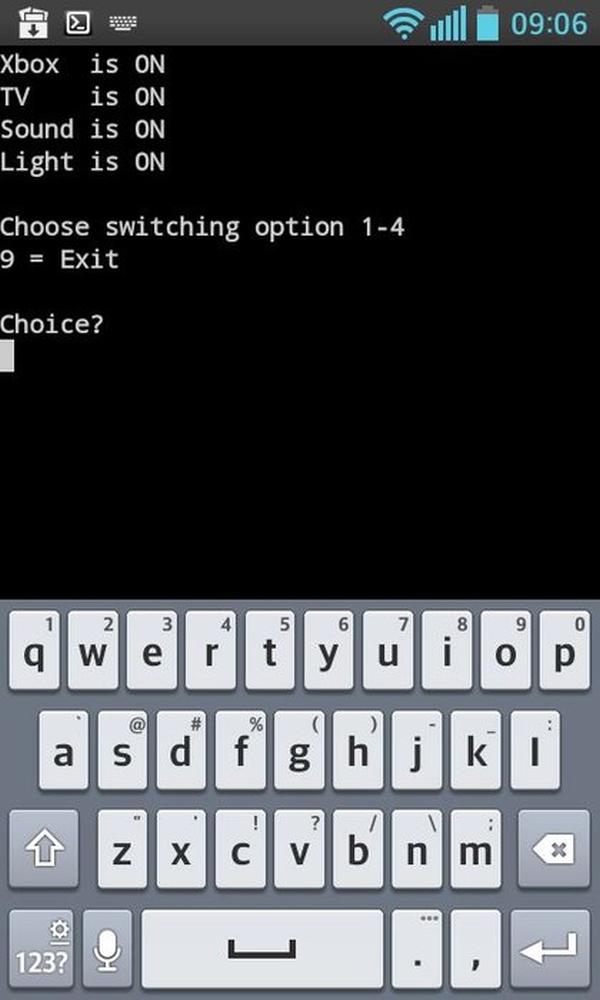
The Raspberry Pi is a linux based machine and I made a python script to do the switching which you can download and use.
I used SSH to connect to the pi via my mobile and tweaked the switch descriptions.
For the media center I used RaspBMC. Click the link for a tutorial on how to get it installed.
Next is the torrent Client Transmission here is the Guide (You may skip Step 1).
Happy switching 🙂